Direct link to annotation: LAUP – Annotation
Content
- What is annotation used for?
- Interface
- Measurement Tool
- Filters and metadata
- Select and save taxon
What is annotation used for?
The taxonomic identification of the recorded insects (annotation) is initially carried out by the AI. As these identification require quality control, users can check the AI’s suggestions on the annotation page and submit their own identifications. Experts also validate the annotations made by other users and by the AI.
Interface
The annotation page displays a single bounding box at a time, i.e. a section of the image containing a single insect. Brightness, contrast and gamma can be adjusted using the corresponding sliders. The section can also be rotated using the rotation slider to view the insect in a craniocaudal orientation, which can make identification easier.
To the right of the image is the taxon list, which can be browsed by scrolling or via the search field (“Search for taxon“); both scientific and common names in several European languages can be searched for. If no animal is visible in a box, the box can be marked as empty via “No animal” and will no longer be displayed for annotation.
Experts using the platform can also view annotation suggestions made so far by the AI and other users, as well as a comment section for providing feedback to other experts.
The image quality can optionally be rated using the star rating (“Rate image quality”). This is used for internal evaluation and the optimization of ARNIs and LAUP.
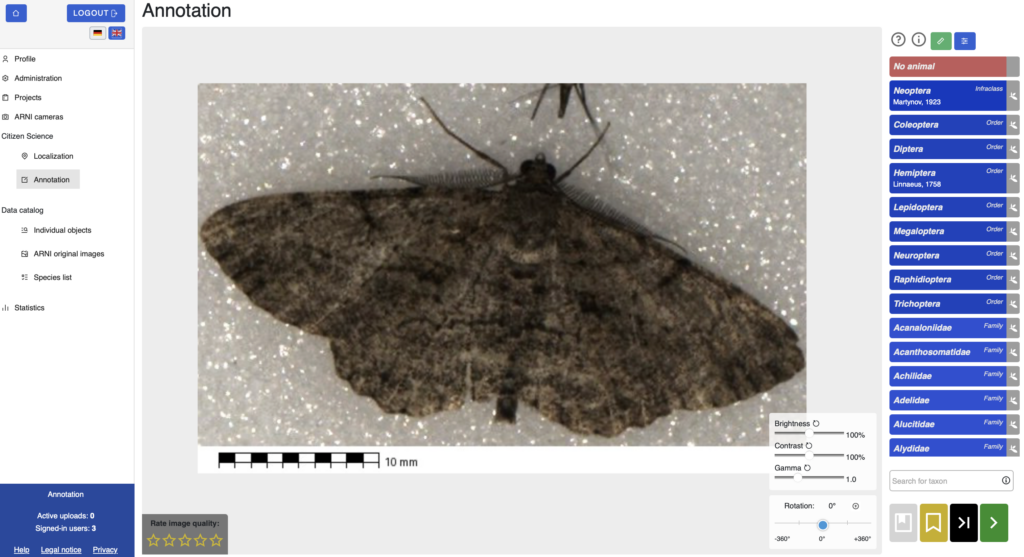
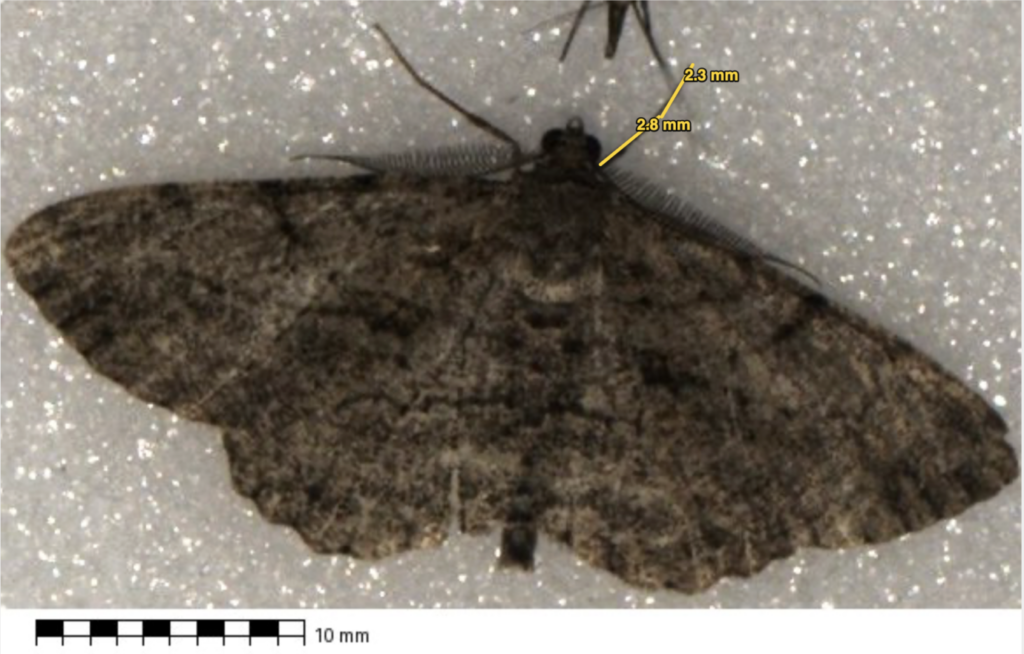
Measurement Tool
You can activate a measurement tool using the green ruler icon in the top right-hand corner. One click sets the starting point, and another click sets the end point of the measurement line. The measured length is displayed directly on the line. The scale at the bottom of the screen serves as a reference. You can draw several measurement lines one after the other and existing lines remain visible. Clicking the ruler icon again exits the measurement tool.
Filters and metadata
The buttons in the top right-hand corner of the image can be used to show or hide additional information:
- ? : User guide
- i : Metadata for the current image (project, ARNI, city, date taken, temperature, air pressure, humidity)
- Filter: Limits the images displayed by project, month, year, state and city. Settings are applied via
"Save settings"and remain saves for future sessions (see also Profile -> Settings: localization and annotation)
Select and save a taxon
Four actions are available in the bottom-right section of the interface:
- Green (save and continue): Once a taxon has been selected, save the annotation and move on to the next bounding box. Changes to contrast, brightness or gamma, as well as measurement lines, are not saved, only the annotation is saved
- Yellow (save and return later): Mark the bounding box for later use
- Black (skip): Skip the bounding box without saving it
- Grey (Go to saved crops): Go to the list of bounding boxes that were saved for later