Administration
The administration page can be accessed via the “Administration” tab in the menu and is divided into two tabs.
Administrators
The “Administrators” section lists all administrators of the LAUP website, along with their usernames and email addresses.
Runs
“Runs” lists all ARNIs registered in the system, grouped by their respective LocalityID.
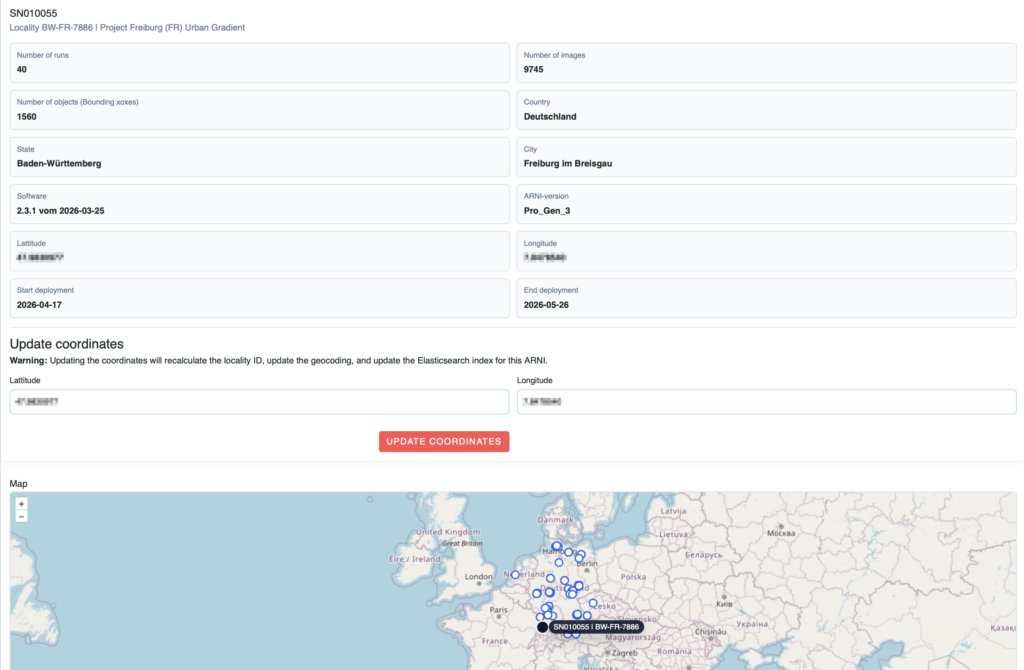
The map provides an overview of the various locations, allowing outliers to be quickly identified and corrected.
Correcting the coordinates results in the following changes:
- The LocalityID is recalculated
- The coordinates of each individual run of the ARNI for that LocalityID are corrected.
What remains unchanged: The coordinates entered in the CSV and log files
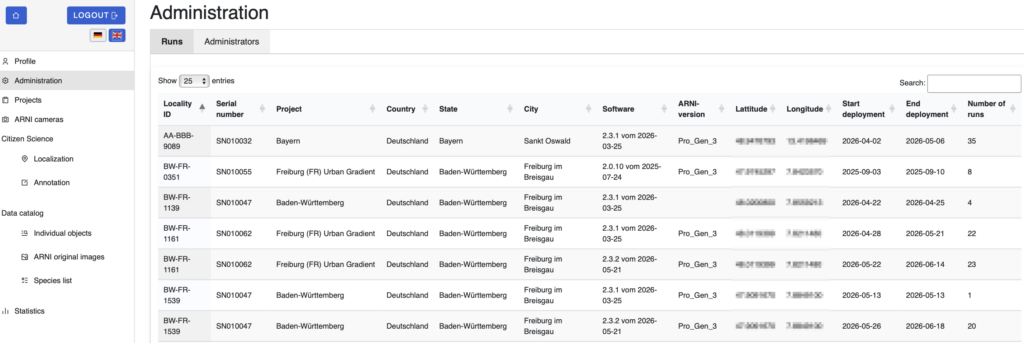
On the right-hand side (for large screens) or below the table (for small screens), a map of all ARNI locations is displayed. Clicking on a location or an ARNI in the table displays the relevant details.
LAUP – Project and Device Management
Projects in LAUP can be created as hierarchical lists. This function is available to administrators only. ARNIs can be added to each project, and multiple runs with images, log files, and environmental measurements can be uploaded under the name of the ARNI.
New project
As project administrator, you can create new projects:

In “Projects” choose “New Project”, and fill out the following form:
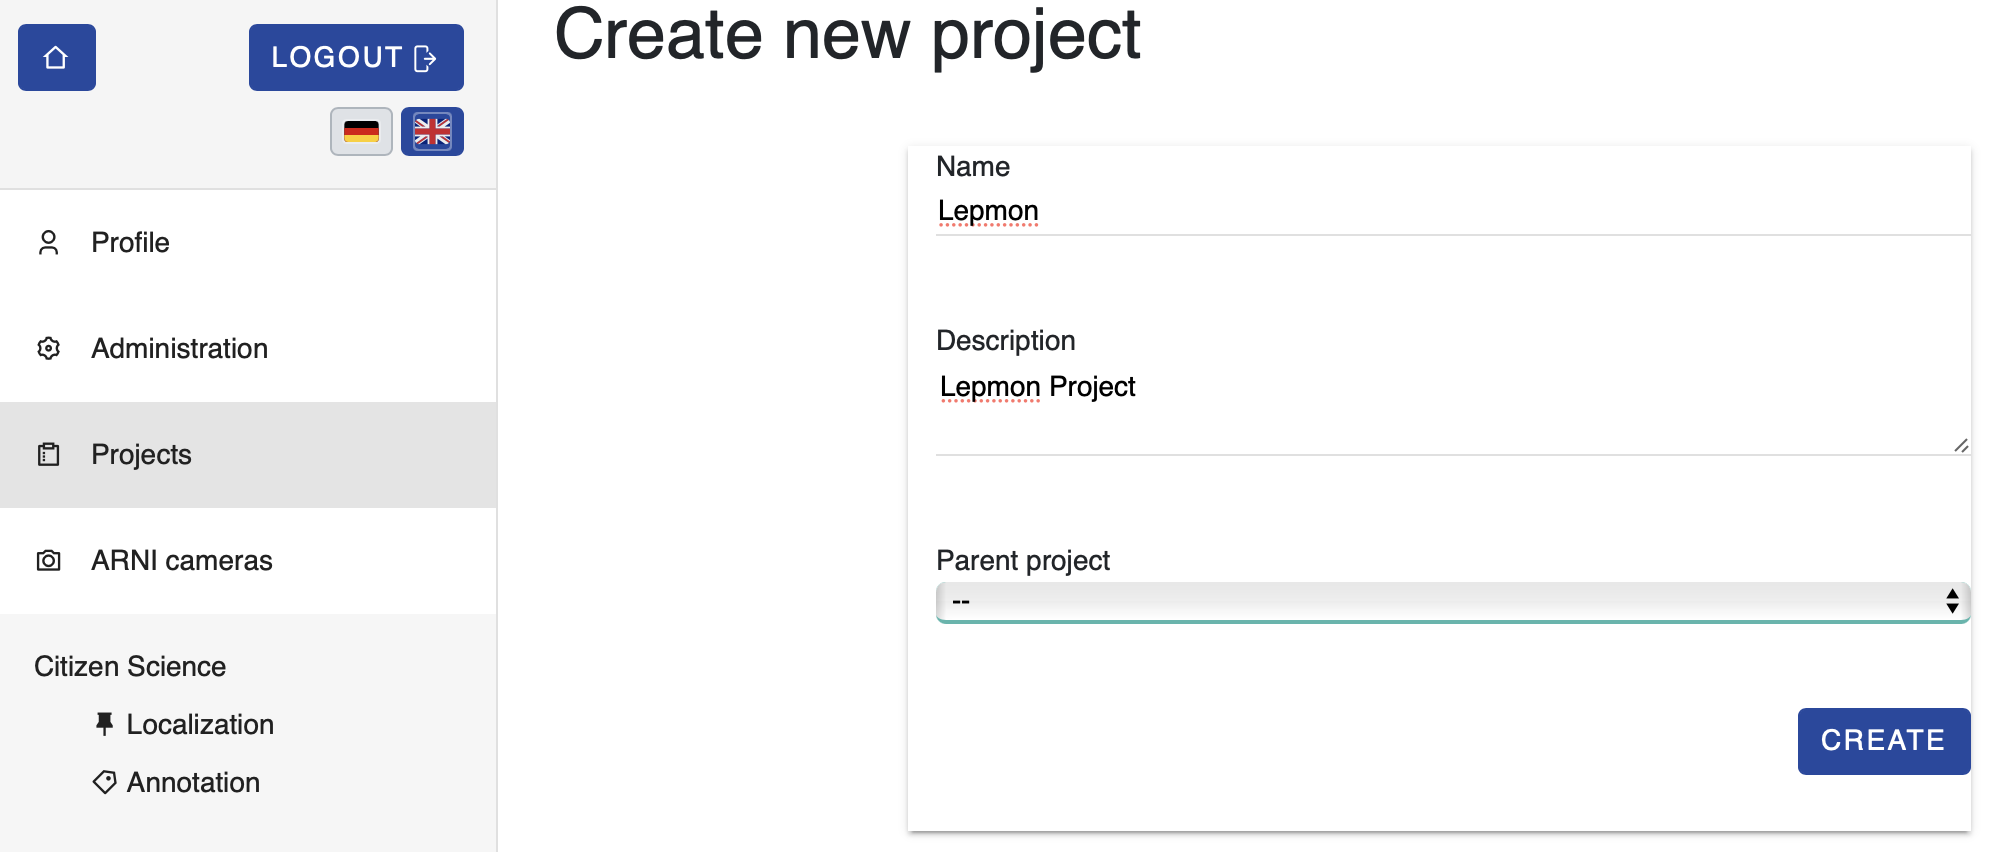
Since projects can be set up hierarchically, you have the option of selecting the superordinate project here. If this is not selected, the new project becomes the top-level project. An example of a hierarchy is:
Lepmon
    Location Jena
    Location Regensburg
    Location Leipzig
       Projekt 1
       Projekt 2
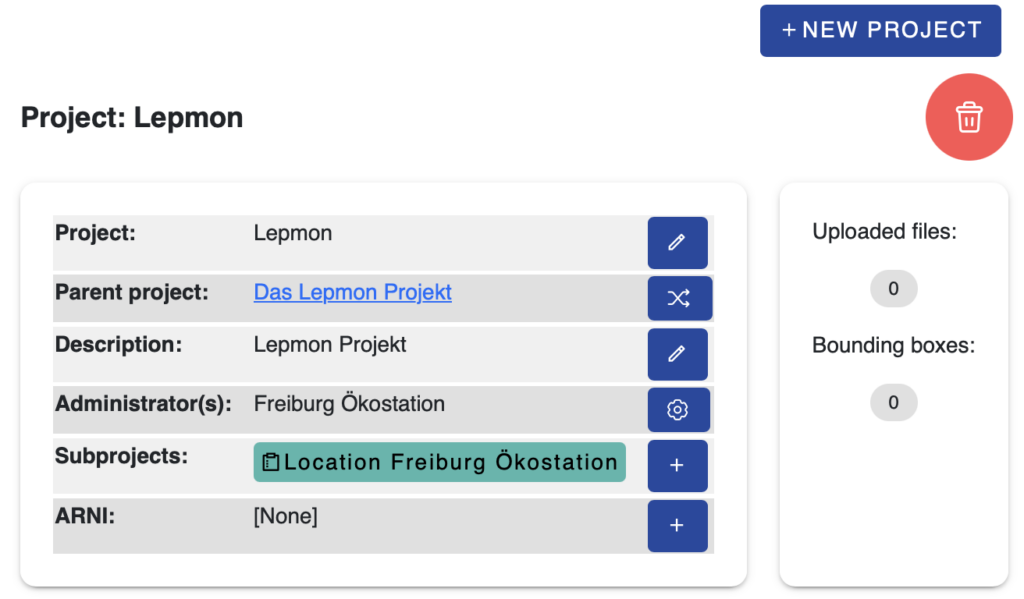
...
Editing projects
A project can be edited immediately after creation or later via the tab “Projects” in the menu.
Additional project administrators, sub-projects and ARNIs can be added to the project. To do either of these, click on the “+”-icon and create. Please note: the creator is already automatically an administrator, so does not need to be added.
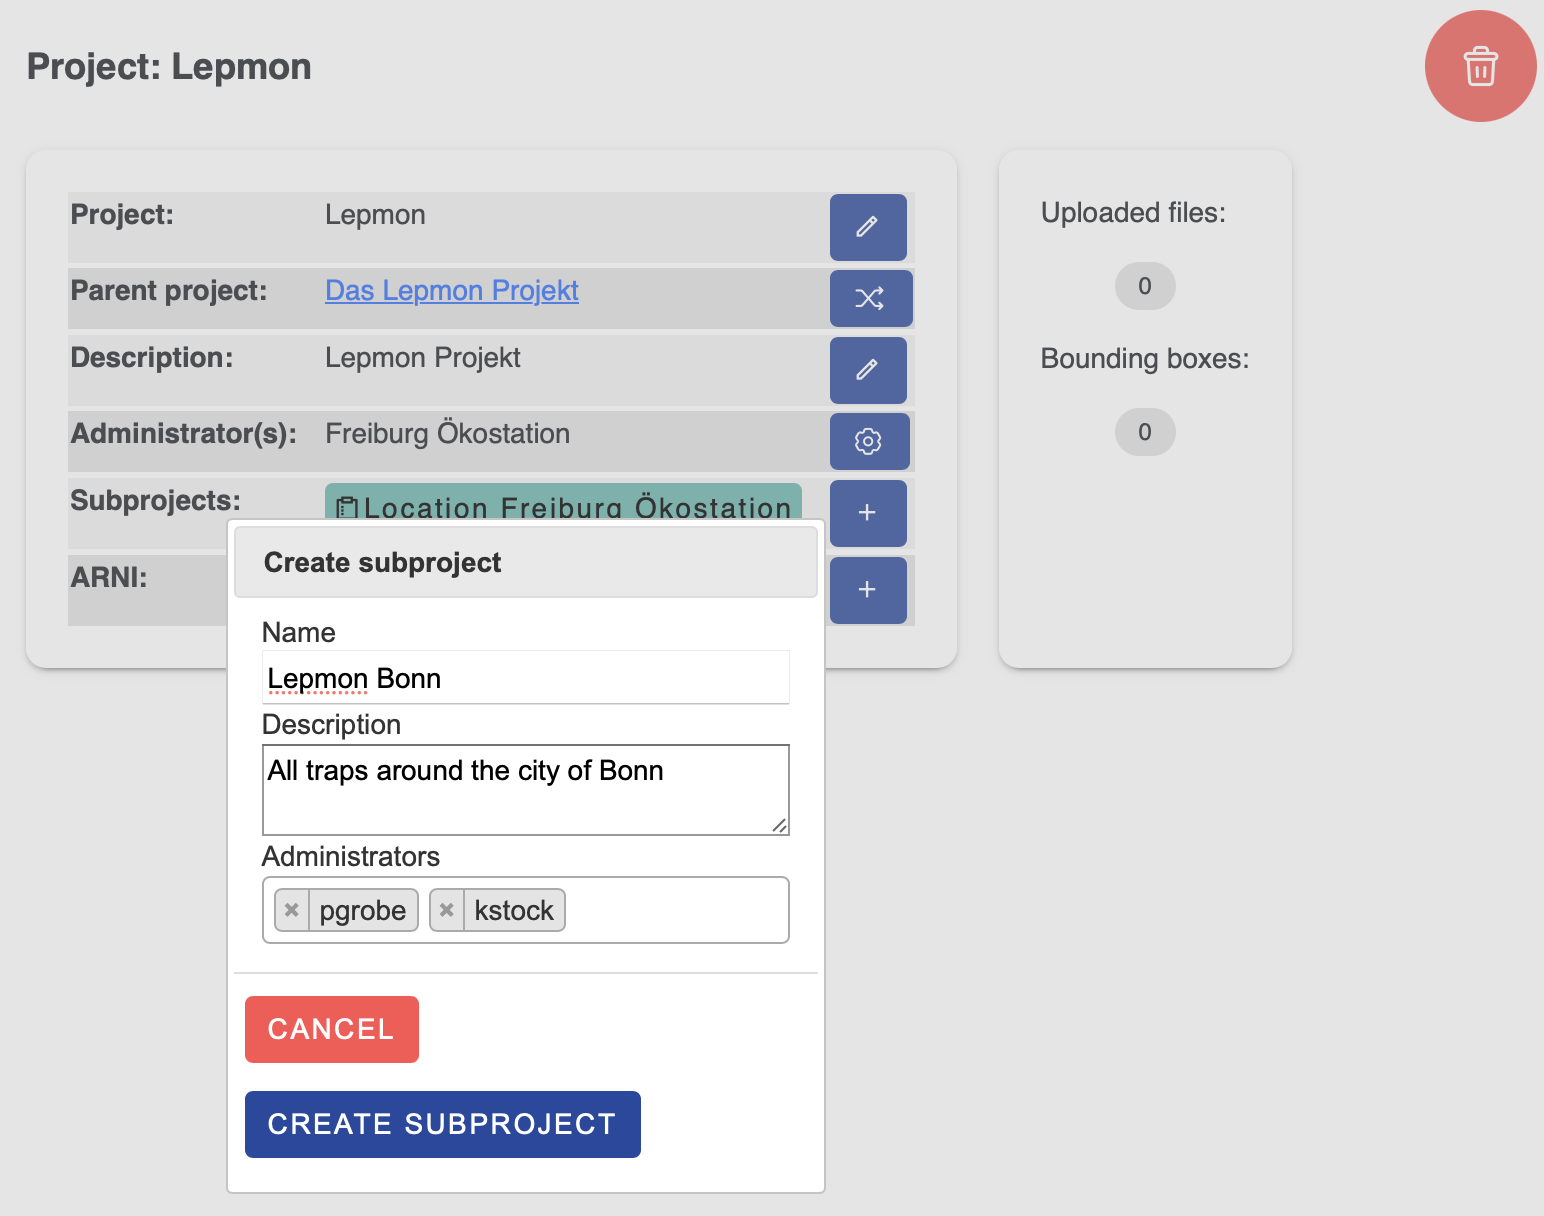
Administrators can be added or deleted at any time. Administrators may add additional persons, add ARNIs, and upload images.
Creating and editing ARNIs
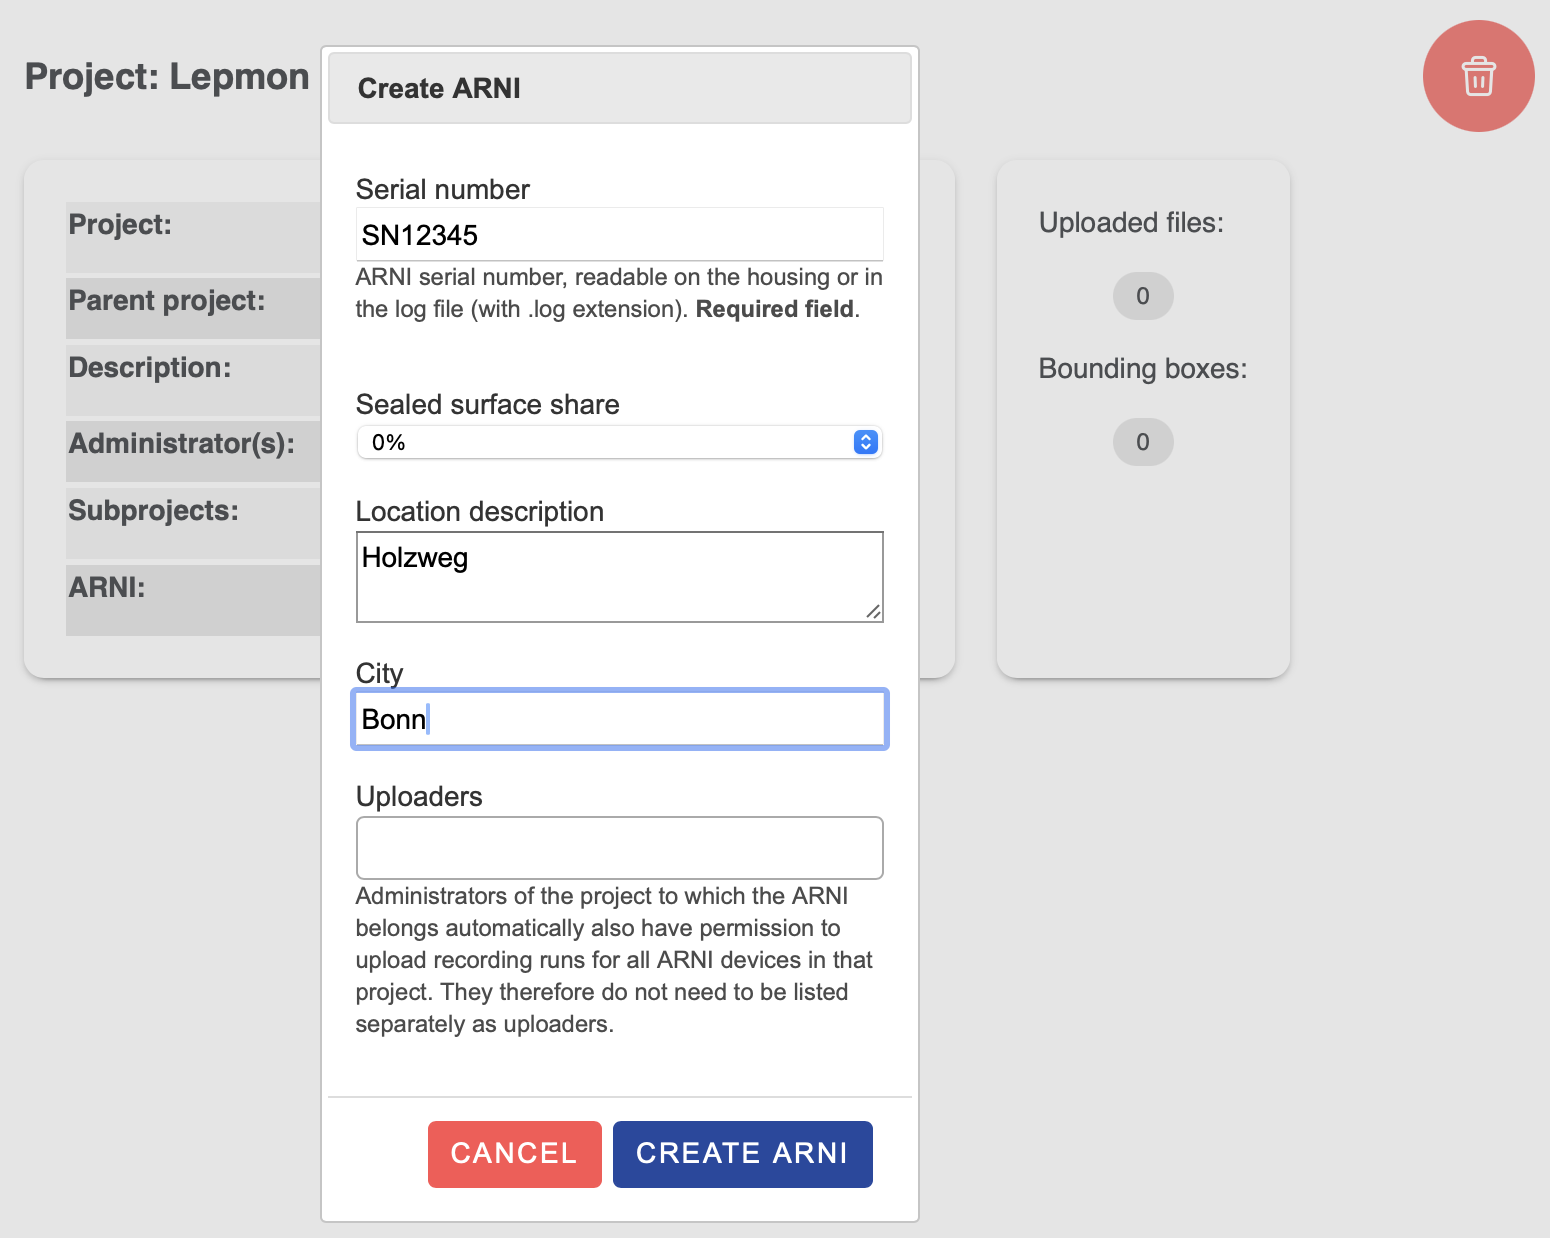
A new ARNI can be added from a project by clicking on the “+” icon on the project page. Fill in the form above with the required information. The most important piece of information is the serial number.
The serial number of the ARNI is located on the yellow field of the ARNI’s UV lamp (Example: SN010006).
The serial number can also be found in the log file that is created on the memory stick.
17:29:25; Logfile erstellt:
/media/Ento/A444-13FD/Lepmon#SN010006_Th_J_2025-05-01_T_1729/Lepmon#SN010006_Th_J_2025-05-01_T_1729.log
The location coordinates (longitude and latitude) are usually already completed when the ARNI is added. They can be found in the log file of the image upload (the file with the .log suffix on the memory stick).
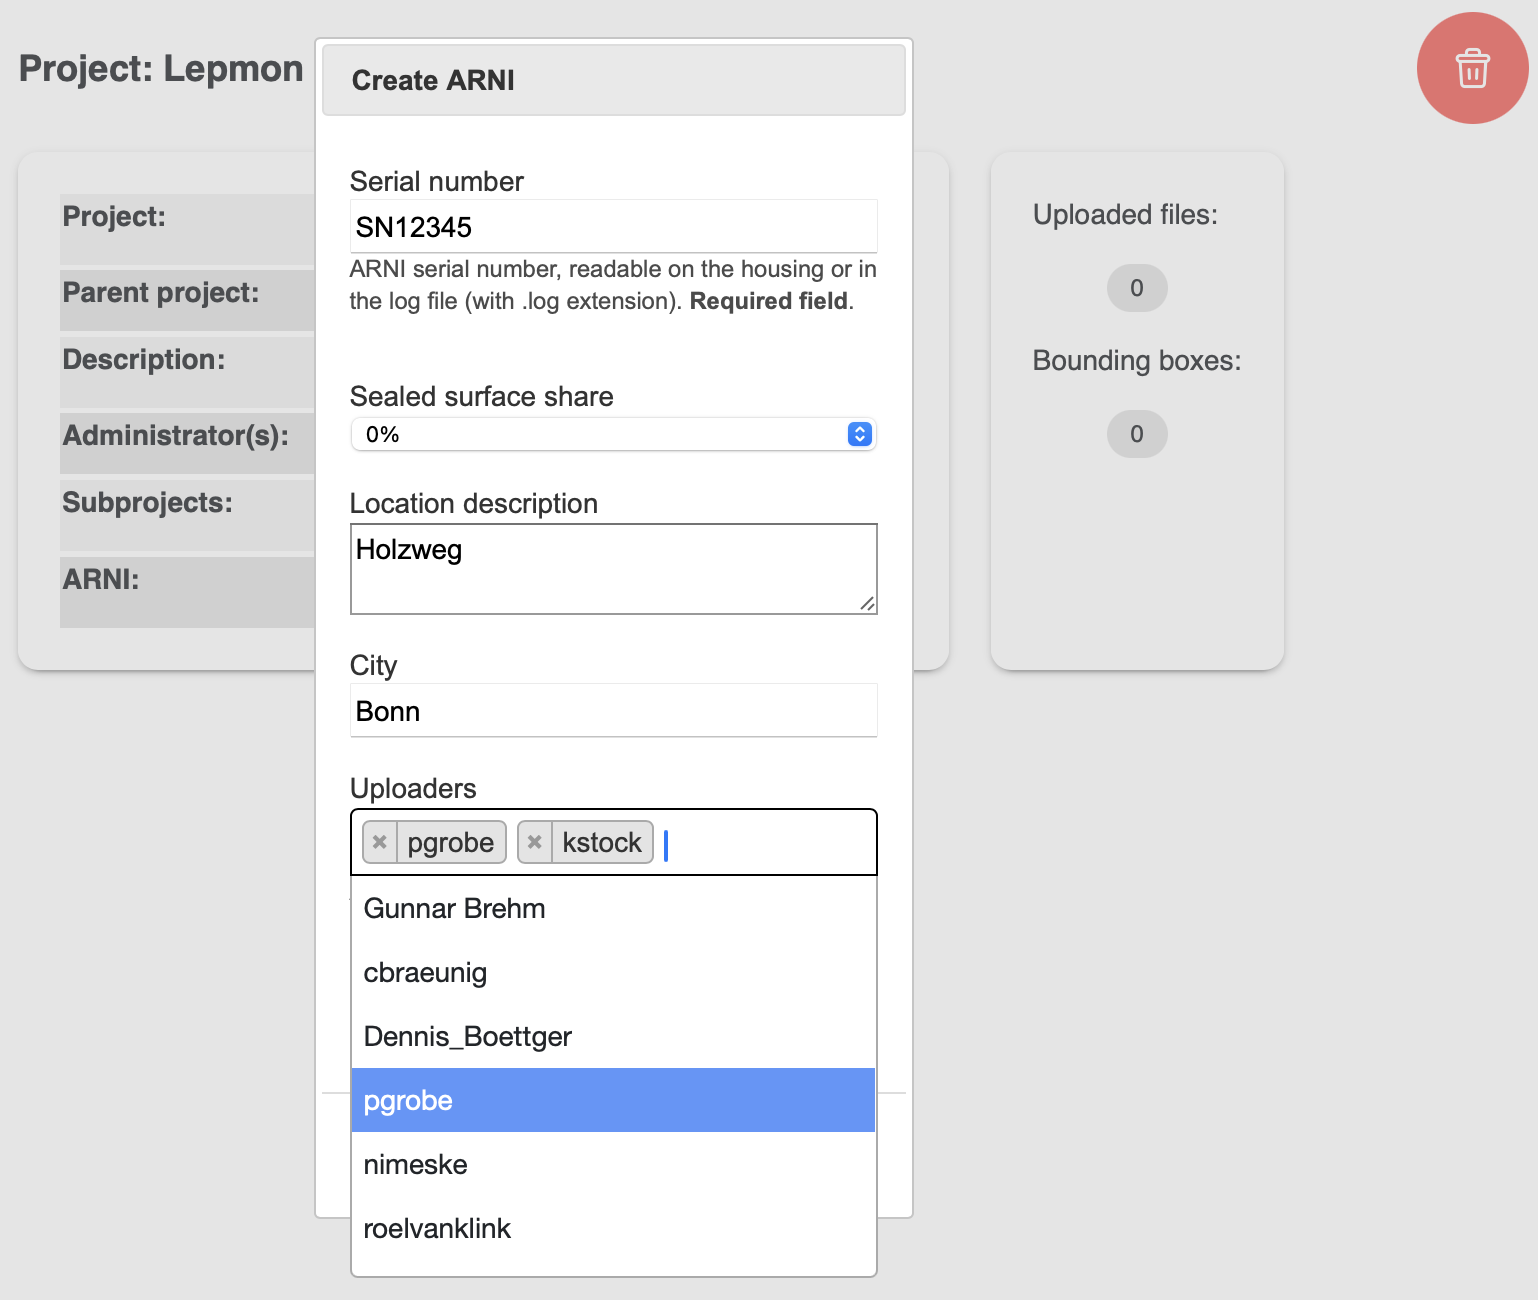
In addition to the project administrators, additional uploaders can be selected for images. To do this, the persons must be registered in the LAUP portal. Persons who monitor the ARNI at the location and will also upload the images are selected here.
Example of the structure of projects with ARNIs:
Lepmon
    Location Jena
    Location Regensburg
       SN12345
       SN12346
    Location Leipzig
       Project 1
         SN699352
       Project 2
...

ARNIs have been added in the projects “Location Regensburg” and “Project 1.”
Once an ARNI has been created, images can be uploaded.
When you select a project from the project overview, statistics on the number of image files already uploaded and the bounding boxes within the project are displayed to the right of the project description.
Bounding boxes are frames that mark and crop individual insects within an image. They are generated automatically by the AI or can be created, adjusted and deleted manually under“‘Localisation“. The result is a cropped section showing only the individual insect. This then forms the basis for subsequent annotation. The number of frames that have already been created, edited or deleted can be viewed under “Profile“.